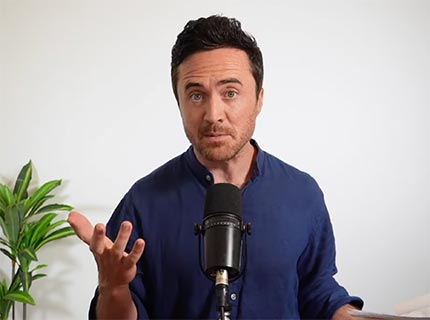

Mastering the ‘summarize group discussion’ task for PTE Academic success

PTE Author
PTE Author

The Summarize Group Discussion task is one of the most comprehensive speaking challenges in PTE Academic. It tests your ability to listen actively, take effective notes, and deliver a coherent summary that captures multiple perspectives.

Understanding how to approach this task strategically can significantly boost your speaking score.

Play
Privacy and cookies
By watching, you agree Pearson can share your viewership data for marketing and analytics for one year, revocable upon changing cookie preferences. Disabling cookies may affect video functionality. More info...

What the task involves

In this task, you'll listen to a conversation between three people discussing an academic topic. Your responsibility is to summarize the entire discussion, capturing what each person says, thinks, and potentially feels about the subject at hand.

The discussions are academic in nature and typically fall into three categories:

  • Lecture discussions

    where students share opinions, clarify concepts, or debate key points

  • Course challenges

    involving difficulties with assignments, project coordination, or study strategies

  • Assignment planning

    where professors provide guidance and students raise concerns or questions

The critical distinction here is that you're not simply summarizing facts. You need to capture the main points of the conversation, the perspectives of each speaker, and how their ideas connect and relate to one another.

Task structure and timing

Understanding the format helps you prepare mentally for what's coming. Here's what you'll see on screen:

At the top of the screen, you'll find the instructions, which remain consistent for every Summarize Group Discussion task. Below that sits an audio box, and at the bottom, a status bar tracks the audio progress.

The timeline:

  • A few seconds to read the instructions before the audio begins automatically

  • Audio duration of 2.5 to 3 minutes (plays only once)

  • 10 seconds to prepare after the audio finishes

  • Up to 2 minutes to deliver your summary

You don't need to use the full two minutes for your response, but you should aim to demonstrate a comprehensive understanding and clear organization. The key is speaking confidently and logically rather than rushing to fill time.

How your response is scored

This is a partial credit task evaluated on three main criteria: content, fluency, and pronunciation.

While pronunciation and oral fluency follow the same standards as other PTE speaking tasks, content scoring has unique requirements for this task.

Content scoring requirements

To achieve a high content score, you must:

  • Summarize the entire group discussion accurately

  • Provide detailed information about what each speaker says, thinks, and feels

  • Deliver an original response without memorized templates or pre-prepared phrases

  • Use a variety of appropriate expressions

  • Connect ideas smoothly using linking words like "however," "on the other hand," and "as a result"

  • Use appropriate academic language throughout

Common mistakes that hurt your content score

Missing what one speaker says or misrepresenting their viewpoint will cost you points. You need to correctly summarize all three speakers' points of view to achieve full marks for content.

The note-taking strategy that works

Since the audio is lengthy and plays only once, effective note-taking is essential. A simple, structured approach will serve you well.

The speaker-based method

Before the audio begins, set up your note-taking template:

Topic: _______________

Speaker 1:

Speaker 2:

Speaker 3:

Leave ample space between each speaker section to accommodate your notes.

As you listen, jot down the discussion topic and the main ideas, opinions, and feelings each speaker expresses. Don't attempt to write full sentences. Use keywords, phrases, or shorthand that will trigger your memory when you speak.

Important consideration: The speakers won't take turns in a neat 1-2-3 pattern. The conversation will shift back and forth, so you need to stay alert about who's speaking and add notes to the appropriate speaker section as the discussion unfolds.

This approach makes organizing your summary significantly easier because you'll already have each speaker's contributions categorized and ready to reference.

Sample discussion: Time management at university

Let's examine a typical discussion you might encounter. Three students discuss time management challenges at university:

Speaker 1 expresses concern about balancing academic work with personal life and extracurricular activities, not wanting university to be only about studying and writing papers.

Speaker 2 describes feeling overwhelmed with lectures, readings, assignments, projects, and exams, barely having time to breathe.

Speaker 3 identifies time management as their biggest challenge, struggling with organization and feeling constantly stressed and exhausted, particularly when adjusting to new schedules each term.

The conversation continues with speakers discussing:

  • Difficulty creating consistent routines across different courses

  • Procrastination and poor long-term planning

  • Challenges with multitasking and jumping between different types of assignments

  • The contrast between structured high school environments and university autonomy

  • Prioritization struggles and feeling burnt out

  • A potential solution: attending a university seminar on time management

What a high-scoring response looks like

A strong response demonstrates several key qualities:

Comprehensive coverage: The response identifies the main topic (time management challenges at university) and addresses each speaker's contributions.

Detailed attribution: It clearly indicates who said what, using phrases like "the first speaker talked about," "the second speaker also mentioned," and "the third speaker agreed with."

Relationship mapping: It highlights areas of agreement (all three struggled with time management and procrastination) and notes unique points from each speaker.

Logical organization: The summary flows naturally from speaker to speaker while maintaining coherence.

Appropriate language: It uses academic vocabulary and connecting phrases to link ideas smoothly.

A sample high-scoring response might sound like this:

"The three speakers were talking about the various challenges they face at university, especially with respect to time management. The first speaker talked about concerns regarding workload and seemed very stressed. They mentioned having no consistency in their routine and particular concerns about course length and workload. They also mentioned challenges with their computer crashing in relation to time management issues.

The second speaker also talked about the number of lectures, projects, and exams they have and said they're not very good with time management, especially because of procrastination. This speaker mentioned that they rush when there's a deadline because they tend to focus on things that interest them rather than things that are important. This person also mentioned an issue with discipline and made a comparison with high school, where teachers provide your schedule, whereas at university you have greater autonomy.

The third speaker agreed with much of what was said and also had an issue with procrastination, the same as speaker two. They talked about time management issues, stress, and exhaustion. They discussed long-term planning as key and multitasking as an important attribute but said this is challenging to achieve. In the end, the third speaker mentioned a seminar on time management and suggested they attend because it might help them."

Perfection isn't required

Even high-scoring responses may contain some hesitations or filler words like "um" or "uh." What matters most is that you capture the main topic, correctly identify details from each speaker, and establish relationships between what they're saying, including areas of agreement or disagreement.

Key strategies for test day success

Stay focused during listening. You only get one chance to hear the audio, so concentration is critical from the first second.

Take clear, organized notes. Use the speaker-based method to keep track of who says what.

Identify the main topic immediately. This provides the framework for your entire summary.

Note supporting details for each speaker. Capture their main ideas, opinions, and feelings.

Organize your summary logically. Structure your response so it flows naturally from one speaker to the next.

Mention each speaker's contributions. Don't leave anyone out or you'll lose content points.

Point out areas of agreement or disagreement. This shows you understand how the ideas connect.

Begin speaking when the microphone opens. Don't wait too long or you'll miss your opportunity to respond.

Speak confidently and clearly. Even if your notes are messy, deliver your summary with assurance.

Practice makes progress

The best way to improve at this task is through deliberate practice. Summarize different discussions using the strategies outlined here. Record yourself and listen back critically. Are you capturing all three speakers? Are you showing relationships between their ideas? Is your delivery fluent and confident?

With focused practice and strategic note-taking, you can master the Summarize Group Discussion task and demonstrate the comprehensive listening and speaking skills that PTE Academic is designed to assess.

The task may seem challenging at first, but with the right approach, you'll be well-equipped to deliver high-scoring summaries on test day.

For more test preparation check out our PTE Academic preparation.

Related Content

  • Image - student, 1080px
    How to apply for a Canadian student visa
    By PTE Author
    Reading time: 6 minutes

    In recent years, Canada has carved out its place on the map as a destination for international students. In fact, the number of students from abroad has tripled over the past decade - and the country is now ranked third in the world for attracting international learners.  

    It’s no wonder. With top universities, multicultural cities, and incredible natural landscapes, Canada is an excellent place to call home and propel your career. So, what type of visa do you need to study in Canada? In this blog, we’ll go through Canada student visa requirements and learn what it takes to apply:  

    Why study in Canada 

    Want to study along the pacific coast with a mountain view? What about in a creative city close to incredible National Parks? Or a stone's throw away from the mighty Niagara Falls? Canada has it all. The country’s landscapes and cities are incredibly diverse - and people who study here will have the opportunity to explore all Canada has to offer. 

    Canada was named the best country for quality of life in 2020. And according to the QS Best Student Cities 2019 ranking, three Canadian cities are listed among the top in the world - including Montreal (6), Toronto (11),and Vancouver (16). Canada is also home to a number of world-class institutions, many of which are ranked in the top 50 globally by the same QS ranking. These include:  

    • University of Toronto (25) 

    • McGill University (31)  

    • University of British Columbia (45)  

    Finally, there’s a good job market for international students in Canada. Between 2009-2019, almost 1.8 million jobs were created in Canada for university graduates. What’s more, 80% of employers say hiring graduates with international experience enhances their companies.  

    Canada student visa requirements 

    To study in Canada, you need to apply for a study permit. This isn’t a visa, because alone, it doesn’t let you enter the country.  But if your study permit is approved, Canada will also grant you either a visitor visa or electronic travel authorization. This will allow you to travel to Canada. 

    Before applying for a study permit, there are a few requirements to keep in mind. For one, you need to already be enrolled at a designated learning institution, which has been approved by the government to accept international students. Check to see if your university or college is on the list.  

    You also need to prove you have enough money to pay for tuition, living expenses and travel costs associated with studying abroad. If you’re alone in Canada and aren’t settling in Quebec, you will need to have at least $10,000 per year - not including tuition. You can demonstrate this money through bank statements, loan information, or proof of a scholarship. Learn more about scholarships for international students in Canada. 

    Finally, you will also need to be in good health, have no criminal record, and be able to prove you will leave Canada when your study permit is no longer valid. 

    Read more in our article about the cost of living in Canada.

    How do you apply?  

    You can apply for your Canadian study permit online or on paper through the mail. You can also apply from outside Canada or inside Canada. You’ll have to make sure you have all your documents ready to submit.  This includes an acceptance letter from your institution, passport, and proof of funds. If you’re planning to study in Quebec, you’ll also need to apply for a Quebec Acceptance Certificate (CAQ).  

    After you submit your application, you’ll need to give biometrics. You will also likely need to provide a police certificate and pass a medical exam. If you apply from outside Canada, the application process will take about eight weeks. If you apply from inside Canada, it will take about nine weeks.  

    That said, there is a way to get your permit approved sooner. If you’re from Senegal, Vietnam, Pakistan, Morocco, India, China, or the Philippines, you can apply through something called the Student Direct Stream. You should get your permit in just three weeks.  

    Learn more about how to apply on the Canadian government website.  

    How much does it cost? 

    A Canadian study permit costs $150, and this usually includes biometrics. But don’t forget to budget in the price of a police certificate or medical exams, if you need them. Depending on where you currently live, these can increase your costs by quite a lot.  

    What can you do on a student permit?  

    If you’re a full-time student, you can work while studying in Canada (as long as your course  lasts longer than 6 months). But first, you’ll need to apply for a Social Insurance Number (SIN) - this can be done in just a few minutes online, for free. You can work either on-campus or off-campus. If you get a job off-campus, you’ll be able to work 20 hours per week - and full-time during school breaks.  

    And what about Canada’s publicly funded healthcare? Well, not all international students are eligible. Since each province administers their own healthcare, it depends on where you study.  

    For example, many international students in the province of Newfoundland and Labrador have access to free healthcare. But students in Ontario don’t. So, it’s best to reach out to your university or college to see what the situation will be for you. At the same time, you can learn about the insurance options available if you aren’t covered through your province.  

    Staying in Canada after graduation  

    Can you stay in Canada after graduating to work? Yes! International students who’ve finished a course longer than 8 months can apply for a post-graduation work permit (PGWD). This can be valid for up to 3 years.  

    Canada also has a number of streams for permanent residence, which you might be eligible for as an international student. To find out if you can apply, check out this tool on the government’s website.  

    Ready to move to Canada? We’ll help you hit the ground running.  

    Our computer- based language test at PTE Academic is accepted by 200 top Canadian institutions for proof of English proficiency -  including the University of British Columbia, McGill University, University of Waterloo, and McMaster University. 

    Learn more about PTE English tests for Canada.  

    Please note: we are not immigration agents. For all up-to-date information about visa rules and regulations, see the official guidelines on the Government of Canada website.   

  • Image - iteachPTE: Juniper Ruperto
    Teacher profile: Helping Filipino students achieve their goals
    By PTE Author
    Reading time: 4 minutes

    In the Philippines, there has long been a culture of emigration. It’s common for Filipinos to move overseas to work, study and live. In fact, there are more than 10 million Filipinos living and working around the world. What’s more, about 60,000 people have emigrated each month since the start of 2021!   

    PTE teacher Jurine Ruperto helps students get ready for the linguistic challenge of moving overseas. She is the owner of Ace Review Center, a language school that prepares students to take the language tests they’ll need for working visas and university applications.  

    We spoke to Jurine to find out about her experience of teaching PTE, and the advice she would offer to other teachers.  

    How Jurine prepares her students for PTE  

    Ace Review Center was one of the first language schools in the Philippines to offer PTE preparation, and they have been helping Filipino professionals and skilled workers prepare for the test for six years.  

    Now, the teachers at Ace Review Center have years of experience in preparing students for the exam - and when it comes to results, their experience shows. 

    “We have a high passing rate - and a good number of students who’ve scored a perfect 90,” says Jurine.  

    So what’s her secret? According to Jurine, she builds her students’ skills slowly as they learn the basics of each task type, through a range of different activities.  

    “One of my favorite activities is idea building or [creating] mind webs, which are very useful in writing tasks,” she says. “Students are given a topic and are encouraged to contribute ideas related to it and expounding with supporting details.” 

    According to Jurine, one of the most common challenges for test takers is vocabulary. In order to help them achieve better results, she encourages them to increase their exposure to English in their everyday lives. “Reading and watching movies and TV shows helps to build their knowledge and familiarity with English terminologies and word usage.”  

    Building student confidence  

    We all have those teaching moments that stick with us, for one reason or another. For Jurine, it's an experience she had with a learner with low confidence that comes to mind. 

    The student needed to build his confidence back up when he came to her for PTE preparation classes. “One of my very first students in PTE had a bad experience in another English test,” she says. “He took the test several times with no success - despite only needing a band score of 5.”   

    So, she said, he signed up for a month of PTE test preparation. It was then that he really started to believe in his language abilities. Jurine thinks the fact that PTE is computer-based made a difference.  

    “It must have helped that the test is through a computer because he would easily get intimidated when facing an examiner during the speaking test,” she explains. His minimum target score for PTE was 54 - but on the day of the test he actually scored above this!  “By now,” she muses, “he must have already finished his culinary studies in Australia.” 

    Jurine’s top tip for PTE teachers  

    When we asked Jurine to share her top tip for other PTE teachers to help their students achieve success, she underlined the importance of really knowing the test inside and out. “It is best for teachers to immerse themselves in PTE sample practice tests to familiarize themselves with the test format,” she says. “That way, they will understand their learners' needs.”  

    Further resources

    You can access preparation resources to help your students through the PTE website, where there are a range of materials available, from Scored Practice Tests to a question bank with over 300 sample questions and answers.  

    The Official Guide to PTE Academic will give you all the information you need to prepare your students thoroughly - and there’s even free course modules available to give your exam preparation teaching skills a boost!  

    Do you have advice and insights to share with other PTE teachers? If so, we’d like to hear from you! Each month we’ll be shining a spotlight on someone from our global teaching community.  

    Don’t forget to sign up for our monthly teacher newsletter, which shares teaching tips for test preparation.

  • 5 common PTE mistakes - and how your students can avoid them
    By PTE Author
    Reading time: 7 minutes

    Learning from our mistakes is one of the best ways to improve. This is also true for anyone who is preparing for an English language proficiency exam, like PTE Academic.  

     In this post, we’ll look at five common PTE Academic errors test takers make, and how you can help your students to avoid these mistakes when they are sitting their exam.  

    1. Reading: reordering paragraphs

    In the PTE Academic reading section, test takers are asked to reorder paragraphs taken from an academic text. They see one panel on the screen with a number of sentences in the wrong order, and need to drag these sentences to a second panel in the correct order. This activity tests how well test-takers can understand the structure of a written text in English.  

    However, many people struggle with this. They don’t pay attention to language clues such as linking words or sentences that open with an introductory statement. These are all things that allow texts to follow a cohesive pattern.